Painting a Room
 One of the most high impact improvements you can make to your home or apartment is interior paint. There are few home improvement projects that can improve the resale value of a property as dramatically for such a relatively small amount of money. This is not a coincidence. A fresh coat of paint can make an entire room full of old furnishings seem nicer, even if it is essentially the same color as the old paint. The actual skills required are easy to learn, as long as you are prepared to get a little bit of paint in your hair!
Color Selection
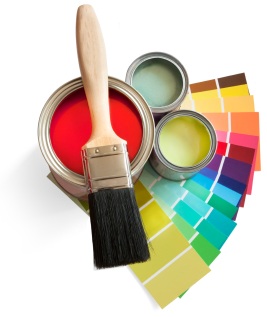
Deciding exactly which color of the vast array available you are going to paint with can be daunting. Keep in mind that darker colors require more effort to apply correctly: at least an extra coat and maybe several. Darker colors can sometimes be significantly more expensive as well. Generally it is a good idea to plan on at least three trips to the paint store. First you should choose quite a few paint color cards that you may like in the store and bring them home. Hold up the chips in the light of the room in question and try to imagine the color multiplied hundreds of times across the walls. Paint colors almost always seem darker or more intense once you have completed painting, so be willing to slide to a lighter shade. On your second trip, have a couple of pretty good colors in mind and see if the store sells small samples of those colors that you can put up on a small section of the wall. If not, you will want to buy a single quart of each “maybe” color. Once back at home, paint a large chunk of a wall with the samples and spend time thinking about these colors as the light changes. Only then can you consider buying the actual paint you will need.
Quality Paint
 The often invoked rule on paint quality is to always buy the best paint you can afford. This is true in most cases. If you have never painted with “premium” paint, I can certainly recommend it. High quality paints minimize faults in the wallboard and problems caused by amateur painters. At the end of the day, all house paints are simply industrial chemicals. Less expensive paints find that savings by omitting or reducing some of their more expensive components. They are a quick-fix: with great skill inexpensive paint can cover a wall, but the color may fade or the paint may not dry well. There are two basic types of household paint: water based and oil based paints. Water based paints are often called latex paint and are excellent for walls and ceilings. They are a more recent innovation that is less hazardous to human health and much easier to clean up after than other bases. Oil-based paints dry much slower and will absolutely require more than soap and water to clean up after. These paints are excellent for trim and doors. Oil based paint dries to a harder finish and therefore provides a more durable surface for surfaces that take a beating. In recent years, many latex paints have improved to the point that oil-based paint is not absolutely required in most cases.
Tips

Use a good ladder and don’t ever balance a paint can anywhere. It is tempting to try to use an old chair or something to get up near the ceiling to hand paint the edge. You will be sorry!
Most people are aware that masking tape is designed to mask off surfaces and edges that you do not want to accidentally paint. What is less well known is that this is supposed to be a second line of defense. Ideally, you should be able to paint without any paint left on the tape. While this isn’t realistic for most beginners, it is a testament to how slowly and carefully you should proceed around the margins of your project.
You are going to drip paint. Always invest the time and effort to lay down a solid drop cloth completely underneath the area you will be painting. Tape it down and make sure you won’t trip on it. In general, the bulk of a painting job is the preparation, so plan on spending a lot of time before you crack open a can.
If you are using several gallons of paint, it is a good idea to mix them together in a larger bucket before you begin, to minimize slight variations in color from can to can. When painting, you need to plan to move from corner to corner in one long effort. The idea is to maintain a “wet edge” throughout the process. Allowing the paint to dry before reaching a corner of the room or a door frame is where the “patchiness” characteristic of beginners comes from.
If you need to stop in the middle of a job, you can tightly wrap paintbrushes and rollers in plastic wrap or baggies instead of cleaning up. If you are done or are stopping for more than a day, clean all your brushes carefully and thoroughly. Once paint dries in a brush or roller, it becomes essentially useless.
Paint settles in the can all day long, so you are going to need to stir it quite a bit before you start painting and periodically throughout the project. Clean the edge of the paint can, including down inside any crevices, before sealing up the paint so that the can will have an airtight seal when closed.
Pay attention to the thickness of the paint as you work. After an hour or so, you may need to add a tablespoon of water (or paint thinner, for oil-based paints) to keep the paint from getting sticky and clogging up you brush and rollers.
Dark colors are going to require more coats, especially if you are transitioning from a lightly colored wall to a dark color. Count on two coats if you are changing from one off-white color to another and up to five or six coats if you are going from a white wall to a deep red.
Always save a small amount of paint in a small container with little airspace above the paint. You will want it sooner (if you have kids or vigorous pets) or later for touchup.


